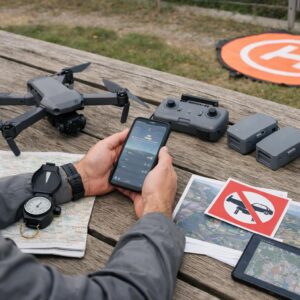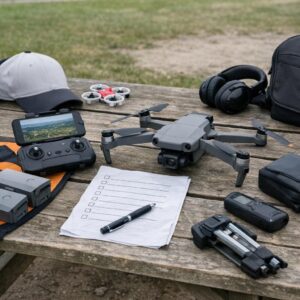
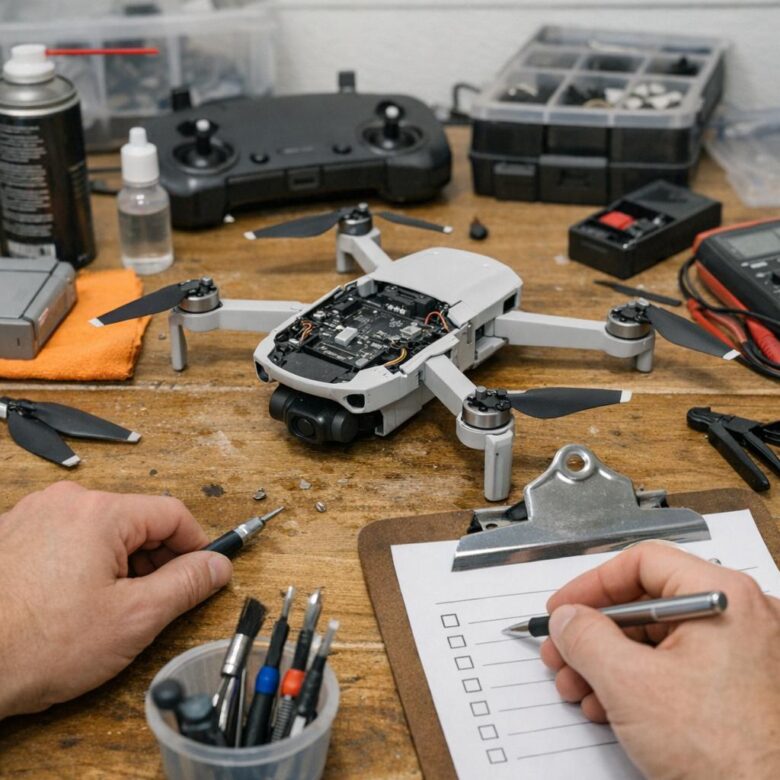
Drone maintenance is less about following an expensive service calendar and more about noticing small changes before they become flight problems. A damaged propeller, swollen battery, obstructed sensor, unusual motor sound, or persistent warning should be addressed before the aircraft returns to the air.
Consumer drones combine lightweight structures, high-speed motors, lithium-ion batteries, cameras, gimbals, antennas, cooling paths, positioning sensors, and software. These parts are exposed to vibration, dust, fingerprints, temperature changes, transportation impacts, moisture, and occasional hard landings.
Maintenance guidance differs by manufacturer and model. Always begin with the current user manual, safety guidelines, support page, and approved repair instructions for the exact aircraft. A procedure that is appropriate for one drone may damage another or affect its warranty.
The aircraft is clean, structurally sound, free of warnings, and responding normally during a controlled preflight check.
Dirt, a minor loose accessory, an overdue update, or a replaceable damaged propeller needs attention before takeoff.
Cracks, battery swelling, liquid exposure, grinding motors, repeated errors, severe vibration, or crash damage make another flight inappropriate.
There is no universal rule requiring every drone to receive new propellers quarterly, professional service after a fixed number of hours, or battery replacement after a particular cycle count. Inspect the actual condition and follow the manufacturer’s model-specific limits.
Before touching the aircraft
Perform cleaning and physical inspection with the aircraft powered off. Remove the battery when the design and manufacturer instructions allow it. Keep the propellers still and avoid placing fingers near the motors while the aircraft is powered.
Use a stable, clean work surface with good lighting. Small screws, propeller hardware, memory cards, covers, and accessories can easily be lost or installed incorrectly.
Do not disassemble the airframe merely to perform routine maintenance. Opening sealed sections can damage cables, antennas, thermal materials, waterproofing features, factory calibration, or warranty coverage.
A practical preflight inspection
Look for cracks, deformation, separation, impact marks, damaged hinges, loose covers, obstructed vents, or an arm that does not lock into its normal position.
Check the leading and trailing edges, tips, hubs, screws, locking tabs, and mounting direction. Replace blades that are cracked, chipped, bent, corroded, loose, or visibly misshapen.
With the aircraft safely powered off, inspect for sand, hair, grass, thread, impact damage, unusual resistance, or looseness. Do not force the motor or apply lubricant unless the manufacturer specifically instructs it.
Confirm that the casing, contacts, latches, charge port, and surrounding aircraft compartment are clean and undamaged. Do not use a battery that is swollen, cracked, leaking, unusually hot, or producing an error.
Remove the gimbal or camera protector before powering on when the model uses one. Confirm that the camera can initialize without a cover, debris, filter, or accessory obstructing its movement.
Look for fingerprints, dust, condensation, scratches, covers, stickers, or debris on the lens, obstacle-sensing cameras, infrared sensors, landing sensors, and positioning modules.
Confirm that control sticks, antennas, cables, ports, screen, phone mount, buttons, and battery level are suitable for the planned flight.
After startup, check battery information, storage-card status, sensor messages, positioning readiness, firmware consistency, gimbal status, home-point recording, and any unresolved error.
When the location is legal and clear, use a low hover to confirm normal response, sound, vibration, position hold, gimbal operation, and video transmission before flying farther away.
Propellers: replace damage instead of trying to repair it
Propellers rotate at high speed and directly affect lift, vibration, motor load, camera stability, and control. A small defect can become more serious during flight.
DJI’s current support guidance advises replacing propellers that are damaged, misshapen, corroded, or loose. The replacement method varies between quick-release propellers, paired blades attached with screws, and protected ducted systems.
Replace the propeller when:
- A blade is chipped, cracked, split, bent, or twisted
- The hub or attachment point is damaged
- A screw or locking tab no longer holds correctly
- The blade has contacted a wall, branch, ground, or hard object
- Corrosion, heat distortion, or chemical damage is visible
- Unexplained vibration remains after inspection
During installation:
- Use the correct part for the exact model
- Match marked and unmarked propellers to the correct motors
- Use the manufacturer-specified screws and screwdriver
- Follow the required blade-pair or complete-set replacement method
- Keep thread-locking material and screw reuse rules in mind
- Rotate the propellers by hand only as instructed and while powered off
A repaired propeller may have altered balance or hidden structural weakness. Replacing it with the correct approved part is safer than attempting to restore its appearance.
Do not replace propellers merely because a generic calendar says three months have passed. Storage, flight hours, collisions, UV exposure, chemicals, temperature, and the design of the propeller all affect service life differently.
Motors: clean the exterior and listen for changes
A motor should rotate and sound consistently with the other motors of the same aircraft. Sand, grass, hair, thread, impact damage, corrosion, or a deformed propeller can create abnormal resistance or vibration.
Stop using the aircraft when a motor:
- Grinds, clicks, scrapes, or makes a new irregular sound
- Feels loose at the shaft or mounting point
- Starts inconsistently or fails to reach normal speed
- Becomes unusually hot compared with the other motors
- Contains material that cannot be removed safely
- Produces recurring overload or propulsion-system warnings
Avoid spraying household lubricant, contact cleaner, water, or high-pressure air into the motor. These products can move debris deeper, affect bearings, damage coatings, or contaminate electronics.
Use only the cleaning method approved for the exact model. A soft brush or hand-operated air blower may be appropriate for loose surface debris, but internal contamination or grinding normally requires qualified inspection.
How to clean the drone without damaging it
| Area | Safer routine approach | Avoid |
|---|---|---|
| Airframe exterior | Use a clean, soft, dry cloth. For permitted light cleaning, use a barely damp cloth and dry the surface immediately. | Soaking seams, ports, vents, motors, battery compartments, or labels. |
| Camera lens | Remove loose particles with a lens blower, then use a clean microfiber lens cloth. Apply approved lens solution to the cloth rather than directly to the camera. | Paper towels, clothing, abrasive cloths, household glass cleaner, or rubbing dry grit across the coating. |
| Obstacle sensors | Use a clean lint-free cloth and follow the manufacturer’s sensor-cleaning guidance. | Residue, fingerprints, stickers, wax, liquid entering the sensor housing, or aggressive rubbing. |
| Motors and propeller mounts | Remove loose visible debris carefully while the aircraft is powered off. | Oil, solvents, metal tools, high-pressure air, or forcing the motor to rotate. |
| Cooling vents | Keep exterior openings unobstructed and remove loose surface dust carefully. | Inserting tools, cotton swabs, or liquid deep into the ventilation path. |
| Battery contacts | Keep them dry and free from dirt. Follow official instructions when contact cleaning is required. | Scraping, bending, sanding, or applying conductive products. |
| Controller and screen | Use an electronics-safe cloth and clean around sticks and ports gently. | Liquid entering buttons, speakers, card slots, charging ports, or ventilation openings. |
Frequent aggressive cleaning can create scratches, remove coatings, push dirt into the aircraft, or damage delicate parts. Routine visual inspection and gentle surface cleaning are normally more useful than repeatedly disassembling components.
Camera and gimbal care
The gimbal contains small motors, dampers, bearings, cables, and calibrated moving parts. It should move through its normal startup sequence without being held by a transport protector or trapped by debris.
When the aircraft is not in use, install the model-specific gimbal or camera protector according to the manual. During setup, remove it before power-on and unfold the aircraft as required.
Do not force the camera through its movement limits. A gentle powered-off check may be part of official troubleshooting for some models, but the camera should never be twisted, pulled, or used as a handle.
Stop and investigate when you see:
- A “gimbal stuck,” overload, or calibration-failure message
- Visible shaking, rapid vibration, or repeated horizon drift
- Grinding, clicking, or an obstructed startup movement
- A torn damper, displaced mount, loose lens filter, or damaged arm
- Blur, stripes, focus failure, or image instability that remains after basic checks
Damaged or misshapen propellers can also cause gimbal vibration. Inspect the propulsion system before assuming that every unstable image is a camera fault.
Battery maintenance without arbitrary cycle limits
Lithium-based flight batteries gradually lose capacity and performance through age, use, storage, heat, deep discharge, and physical damage. Cycle count is useful context, but it is not a universal replacement deadline.
Battery habits that matter
- Inspect for swelling, cracking, leakage, damaged contacts, or impact marks
- Allow a hot battery to cool
- Use the charger or charging protocol approved for the model
- Charge in a suitable location away from combustible clutter
- Stop when the charger, battery, or application reports an abnormal condition
- Follow the exact model’s storage-charge guidance
- Keep batteries in a dry, ventilated place
- Avoid parked vehicles, direct sun, freezing conditions, and extreme heat
- Prevent metal objects from touching the terminals
- Recheck batteries stored for long periods
- Confirm the battery is fully seated and latched
- Review cell, temperature, cycle, and warning information when available
- Use a conservative plan in cold, hot, windy, or remote conditions
- Do not fly a battery that behaves differently from previous flights
- Allow the battery to cool before charging
- Inspect after hard landings or collisions
- Record unexpected voltage drops or reduced endurance
- Prepare the battery for storage when it will not be used soon
DJI’s general camera-drone battery guidance currently recommends storing many compatible Intelligent Flight Batteries at approximately 40% to 65% when they will not be used for more than 10 days, in a cool and dry environment. It also recommends periodic maintenance during extended storage.
This should not replace the manual for the exact battery. Auto-discharge behavior, storage percentage, hibernation logic, compatible chargers, maintenance intervals, and operating-temperature ranges differ between products.
Do not fly or charge a battery that is swollen, cracked, leaking, producing a strong odor, unusually hot, physically damaged, recalled, or repeatedly generating cell and communication errors. Contact the manufacturer or a qualified battery collection facility for next steps.
Battery replacement should be based on condition
Statements such as “replace every battery after 200 cycles” or “retire it at exactly 70% capacity” cannot be applied safely to every model.
Replacement or professional evaluation is appropriate when:
- The casing is swollen, cracked, punctured, or deformed
- The battery no longer locks securely into the aircraft
- Cell imbalance or communication errors continue
- The battery becomes unusually hot during normal use
- Voltage falls unexpectedly under load
- The aircraft shuts down or enters unexpected emergency behavior
- Useful flight time has declined substantially and repeatedly
- The battery was involved in a serious collision, water exposure, or recall
Disposing of a lithium battery
Lithium-ion batteries should not be placed in household garbage or ordinary curbside recycling. The U.S. Environmental Protection Agency recommends taking them to a specialized battery recycler, electronics retailer collection point, or household hazardous-waste facility.
Follow the receiving facility’s instructions. For routine end-of-life batteries, terminals are commonly protected with nonconductive tape or the battery is bagged individually to reduce short-circuit risk.
A damaged or swollen battery may require a different handling process. Contact the manufacturer and the collection facility before transporting it rather than mailing or carrying it without guidance.
Weather and environment change the maintenance required
Inspect motors, vents, joints, gimbal areas, and camera surfaces. Do not force embedded grit deeper into the aircraft.
Check for residue and corrosion. Avoid applying water unless the manufacturer provides a specific cleaning process.
Follow battery-temperature guidance and allow cold equipment to acclimate before power-on when condensation is possible.
Let equipment cool, avoid storing it in a parked vehicle, and watch for thermal or battery warnings.
After beach or desert use
Sand and fine dust can enter motors, hinges, vents, controller sticks, gimbal areas, and charging ports. Use a clean landing pad when appropriate and keep equipment closed until it can be inspected in a controlled environment.
Do not repeatedly spin a contaminated motor to “work the sand out.” When grit remains, abnormal resistance appears, or vibration begins, stop using the aircraft and arrange inspection.
After fog, drizzle, or unexpected moisture
Unless the exact aircraft has an official environmental rating that covers the conditions, do not assume it is waterproof or rain-resistant.
Land as soon as it can be done safely, power down, and follow the manufacturer’s moisture-exposure instructions. Do not use heat guns, ovens, hair dryers, or direct high heat to accelerate drying.
Moisture may remain inside ports, motors, body seams, or the battery compartment after the exterior appears dry. Persistent errors, condensation, corrosion, or substantial exposure require qualified service.
Firmware, applications, and calibration
Software maintenance affects flight controls, battery management, camera operation, Remote ID behavior, transmission, maps, and accessory compatibility. Updating without preparation can also reset settings or create temporary incompatibility.
Read the release notes, confirm model and controller compatibility, charge the required devices, preserve important settings, and allow enough time for troubleshooting.
Follow the manufacturer’s procedure, maintain the required connection and power level, and do not interrupt the process unless official instructions say to do so.
Restart the system, check firmware consistency, review camera and safety settings, confirm Return to Home behavior, and complete a controlled test before important work.
Some drones update through the flight application, while others also support desktop software. Battery, controller, goggles, accessories, or modules may need consistency updates of their own.
Avoid installing an update immediately before a deadline when there is no time to verify the aircraft. This is an operational precaution, not a reason to ignore safety or compliance updates indefinitely.
Do not calibrate everything routinely
Compass, inertial measurement unit, gimbal, vision, and controller calibration serve different purposes. Repeated calibration without a prompt or documented reason can introduce mistakes, especially when performed near metal, reinforced concrete, vehicles, speakers, power equipment, or magnetic objects.
Calibrate only when the application or manual calls for it, after an appropriate repair or component change, or when following official troubleshooting. Resolve the environmental cause of a warning before assuming calibration is the solution.
Storage and transportation
A drone can be damaged while it is not flying. Pressure on the camera, a loose battery, extreme vehicle heat, moisture trapped in a case, or unprotected propellers can create the next flight problem.
For storage
- Power off the aircraft and controller completely
- Prepare batteries according to their storage guidance
- Install the correct gimbal or camera protector
- Keep pressure away from propellers, antennas, and control sticks
- Store equipment in a dry, ventilated location
- Avoid direct sunlight, freezing areas, heaters, and parked vehicles
- Prevent tools and metal objects from contacting batteries
For transport
- Use a case that prevents movement and impact
- Protect the camera and gimbal without forcing them
- Keep spare propellers and small hardware organized
- Protect battery terminals from short circuits
- Do not place heavy objects on the aircraft
- Allow cold equipment to acclimate when condensation is possible
- Review airline and destination rules before travel
Air travel with drone batteries
The FAA requires spare lithium batteries to be carried in carry-on baggage rather than checked baggage. Terminals must be protected against short circuits, and damaged, defective, or recalled batteries should not be taken aboard passenger aircraft.
Battery watt-hour limits, airline approval requirements, quantity limits, international rules, and carrier policies can differ. Check the battery label, calculate watt-hours when necessary, and confirm the airline’s current conditions before traveling.
What to do after an incident
After a hard landing
- Power down and inspect the landing structure
- Check arms, hinges, shell, propellers, motors, and battery latches
- Review the gimbal, camera, sensors, and application warnings
- Do not return to normal flight when vibration or structural doubt remains
After a collision
- Replace contacted or damaged propellers
- Check the battery for leakage or swelling
- Inspect arms, motors, guards, shell, gimbal, and antennas
- Use manufacturer diagnosis when external force may have caused hidden damage
After water exposure
- Do not power the aircraft on merely to test it
- Power down if it is safe to do so
- Remove the battery only when safe and permitted by the design
- Contact qualified service for substantial exposure or submersion
After a flyaway or forced landing
- Preserve flight logs and warning information
- Photograph the condition before cleaning or repair
- Inspect the retrieved aircraft and battery separately
- Do not reuse a damaged battery or aircraft without evaluation
When an arm, motor, battery mount, gimbal, shell, or internal component may have been damaged, sending the aircraft into the air can turn a repairable problem into a loss or safety incident.
When professional service is the better choice
User-replaceable parts vary by model. Propellers and some guards may be designed for owner replacement, while motors, arms, gimbal cables, antennas, batteries, internal boards, and sealed assemblies may require specialized tools and calibration.
Contact the manufacturer or an authorized repair provider when:
- The aircraft was involved in a substantial collision or drop
- It was submerged or exposed to significant liquid
- An arm, hinge, shell, motor mount, or battery compartment is cracked
- A motor grinds, overheats, remains loose, or fails to start normally
- Gimbal errors, shaking, or calibration failures continue
- Positioning, compass, IMU, vision, or communication errors persist
- The aircraft repeatedly loses power or reports battery-cell problems
- A repair requires soldering, internal disassembly, calibration, or unavailable torque specifications
- The repair may affect warranty, compliance, or safe flight
Avoid tightening random screws simply because one appears accessible. Some fasteners use specific torque, thread-locking compounds, washers, installation order, or replacement requirements. Follow an official repair manual when one exists.
A maintenance schedule that responds to use
Inspect the airframe, propellers, motors, battery, camera, gimbal, sensors, controller, storage, warning messages, home point, and control response.
Inspect after dust, sand, salt air, high heat, cold, moisture, strong wind, rough terrain, a hard landing, or any propeller contact.
Clean the exterior, inspect damage, prepare batteries correctly, install transport protection, back up files, and store the equipment in a suitable environment.
Recheck battery condition, firmware, application compatibility, time and date, storage card, controls, sensor warnings, and Return to Home settings before normal use.
Confirm settings, component installation, firmware consistency, calibration status, camera behavior, and low-risk flight response.
Investigate new vibration, shorter endurance, abnormal heat, inconsistent controls, focus changes, transmission problems, or repeated warnings immediately.
Heavy commercial or enterprise operations may have manufacturer maintenance programs based on time, flight hours, cycles, or operational conditions. Follow those programs when they apply rather than substituting a consumer checklist.
Keep a simple maintenance record
A log is not required for every ordinary consumer flight, but it can reveal recurring problems and prevent uncertainty about when a battery, propeller, update, or repair was introduced.
| Date | Aircraft or battery | Observation | Action taken | Ready for flight? |
|---|---|---|---|---|
| Example | Battery 2 | Useful flight time noticeably shorter during two similar flights | Checked cell information, temperature, and storage history; battery held from critical work | Pending evaluation |
| Example | Front-left propeller | Small chip after contact with dry grass and gravel | Replaced correct blade pair using approved screws | Yes, after low hover check |
| Example | Aircraft firmware | Update installed and camera settings reset | Reviewed Return to Home, control, camera, storage, and gimbal settings | Yes, after test flight |
Complete drone maintenance checklist
- Airframe has no cracks or deformation
- Arms and hinges lock normally
- Propellers are undamaged and correctly installed
- Propeller screws and locks match the manual
- Motors are free from visible debris
- No motor produces abnormal sound or resistance
- Battery casing and contacts are undamaged
- Battery locks securely into the aircraft
- No battery warning remains unresolved
- Gimbal protector is removed before power-on
- Gimbal completes its normal startup movement
- Camera lens is clean
- Obstacle and landing sensors are clean
- Cooling vents are unobstructed
- Controller sticks and antennas are intact
- Cables and ports are undamaged
- Memory card is recognized
- Firmware versions are compatible
- Important settings were reviewed after updates
- Compass and IMU show no unresolved error
- Home point and positioning are correct
- Flight logs were preserved after abnormal events
- Transport protector is installed after use
- Batteries are prepared for the expected storage period
- Equipment is not stored in extreme heat or cold
- Spare battery terminals are protected during travel
- Damaged lithium batteries are kept out of household waste
- Professional service is arranged when damage is uncertain
Frequently asked questions
How often should drone propellers be replaced?
There is no universal calendar interval for every consumer drone. Inspect them before flight and replace blades that are damaged, misshapen, corroded, loose, incorrectly mounted, or involved in a collision. Follow any model-specific replacement interval in the manual.
Can compressed air be used to clean drone motors?
High-pressure air can push debris deeper or affect delicate parts. Use only a method approved by the manufacturer. Loose exterior debris may be removed with a soft brush or hand blower when appropriate, while internal contamination or grinding requires service.
Should motor bearings be lubricated?
Do not apply lubricant unless the official maintenance procedure for the exact motor calls for it. Oil can attract dust, migrate into electronics, and change bearing or motor behavior.
At how many cycles should a drone battery be replaced?
No single cycle number applies to every battery. Consider age, swelling, physical condition, cell balance, temperature, errors, voltage behavior, useful flight time, storage history, manufacturer limits, and the importance of the planned flight.
Can a swollen battery be placed in household recycling?
No. Lithium-ion batteries should not go into household garbage or ordinary curbside recycling. Contact the manufacturer and a suitable battery recycler or household hazardous-waste facility for handling instructions.
Should firmware always be updated immediately?
Review the official release notes and update requirements. Safety, compatibility, or compliance updates should not be ignored, but the update should be performed with enough time, power, and connectivity to complete it correctly and verify the aircraft afterward.
Does every crash require professional repair?
A minor event may require only replacement of an approved user-serviceable part, but substantial impact, structural uncertainty, battery damage, motor problems, gimbal errors, or recurring warnings should be evaluated by the manufacturer or a qualified service provider.
Can a wet drone be powered on after it looks dry?
Exterior dryness does not confirm that internal components are safe. Do not power on a submerged or substantially wet aircraft merely to test it. Follow the manufacturer’s instructions and arrange service when significant exposure occurred.
Effective maintenance does not require inventing rigid replacement schedules or opening the aircraft after every flight. It requires consistent inspection, gentle cleaning, correct battery storage, careful transportation, attention to software warnings, and the discipline to stop flying when the aircraft’s condition is uncertain.
A small defect is normally easier and less expensive to address on the workbench than after it causes vibration, power loss, camera damage, or an emergency landing.
Official references
- DJI Support — Battery Routine Maintenance Guide
- DJI Support — Intelligent Flight Battery Auto-Discharging Rules
- DJI Support — Attaching, Inspecting, and Replacing Propellers
- DJI Support — Troubleshooting a Stuck Gimbal
- DJI Support — Camera Drone Gimbal Shaking
- DJI Support — Aircraft Damage After Collision or Dropping
- DJI Support — Mavic Series Inspection and Repair Manual
- U.S. Environmental Protection Agency — Lithium-Ion Battery Disposal
- FAA PackSafe — Lithium Batteries in Passenger Baggage
- FAA PackSafe — Traveling with Drones

Dflyco Editorial Team creates practical, well-researched content about drones, aerial photography, flight safety, and responsible drone use. Our articles are reviewed using official documentation, manufacturer specifications, and trusted aviation sources to help readers make informed decisions.