Most disappointing drone photographs are not caused by an inexpensive camera. They result from decisions made before the shutter is pressed: choosing the wrong altitude, accepting poor light, overlooking focus, trusting a small preview, using an unsuitable route, or attempting to repair every weakness during editing.
Drone photography combines two responsibilities. The operator must control an aircraft safely while also making decisions about exposure, composition, focus, timing, and file format. Trying to solve all of these at once often leads to rushed photographs and unnecessary flight time.
The practical solution is not a permanent list of exact altitudes, percentages, or camera settings. It is a repeatable method for identifying the visual problem, choosing the simplest safe correction, and reviewing the result before moving to another shot.
There is no requirement to keep top-down images below 10% of a session, photograph most subjects between 50 and 120 feet, schedule 90% of work during golden hour, or use 1/500 second for every still photograph. The appropriate decision depends on the subject, camera, conditions, legal limits, and intended result.
Flying higher before deciding what the image needs to show
Altitude changes the relationship between the subject and its surroundings. As the drone climbs, it generally reveals more context but makes the main subject smaller. A lower position may reveal shape, texture, facade detail, terrain, or foreground depth that disappears from a higher view.
The mistake is not flying high. The mistake is climbing automatically without identifying what the additional height contributes.
Climb toward the maximum available altitude, center the subject, and assume the largest visible area will create the strongest photograph.
Begin at the lowest safe and legal position that explains the subject. Increase altitude only when the wider context adds useful information.
Choose altitude from the visual purpose
- Lower oblique view: useful for architecture, entrances, people providing scale, foreground layers, and a stronger sense of depth.
- Moderate overview: useful for showing a building within its lot, a trail within terrain, or a subject connected to its immediate surroundings.
- High context view: useful when geography, road networks, coastline shape, land use, or large-scale patterns are the subject.
- Top-down view: useful when the important information is shape, symmetry, repetition, texture, or spatial arrangement.
The controller’s height display may be measured relative to the takeoff point rather than the terrain directly below the aircraft. Continue to observe altitude limits, airspace authorization, terrain, visual line of sight, and obstacles rather than treating a camera decision as separate from flight planning.
Leaving the horizon tilted without checking why
A tilted horizon can make coastlines, city skylines, lakes, and architectural scenes feel unbalanced. However, not every mountain ridge, riverbank, road, or shoreline is naturally horizontal.
Before correcting the image, identify whether the apparent tilt comes from the aircraft, gimbal roll, perspective, terrain, lens distortion, or the actual shape of the landscape.
Use reliable visual references
- Enable grid guides or a center marker when supported.
- Compare the frame with distant water, a true skyline, vertical building edges, or another reliable reference.
- Check the entire frame rather than aligning one nearby roof or sloped road.
- Review a test photograph because the reduced live feed may hide a small error.
- Use gimbal-roll adjustment or calibration only according to the manufacturer’s instructions when a persistent equipment issue exists.
Straightening during editing crops part of the frame. The amount of lost image area depends on the angle, original aspect ratio, available border, lens correction, and final crop. It cannot be converted into one universal megapixel-loss formula.
A deliberate camera angle may support movement, tension, or an abstract composition. The important distinction is whether the angle strengthens the photograph or appears accidental.
Treating one time of day as correct for every subject
Golden hour is popular because lower-angle light can create long shadows, warmer color, and visible terrain or architectural texture. It is not the only useful light.
Midday can work well for bright water, directly overhead patterns, swimming pools, agricultural fields, roof layouts, or scenes where long shadows would conceal important detail. Overcast light can reduce contrast and provide even illumination. Blue hour can balance artificial lights with a visible sky.
Useful for texture, long shadows, warm color, silhouettes, terrain relief, and dimensional architecture.
Useful for graphic top-down images, bright water color, reduced side shadows, and clear property layouts.
Useful for soft contrast, forest detail, consistent exterior coverage, and subjects that do not benefit from harsh shadows.
Useful for city lights, illuminated buildings, cooler atmosphere, and scenes requiring a balance between sky and artificial light.
Choose the time according to the direction of the sun, weather, subject orientation, property access, airspace, wildlife, required night procedures, and the visual information that must remain visible.
Longer exposures, dim surroundings, glare from city lights, and reduced aircraft visibility can increase operational difficulty. Shorten the route, satisfy applicable lighting requirements, and land when visual line of sight or orientation cannot be maintained.
Using fixed camera settings without checking movement or exposure
ISO 100 and a fast shutter are useful daylight starting points, but they are not permanent requirements. A low ISO does not help when the resulting shutter speed allows aircraft movement, wind, or a moving subject to blur the photograph.
Manual exposure is useful when the light and camera angle remain stable. Automatic or semi-automatic exposure can be practical when conditions change quickly or the pilot needs to prioritize aircraft control.
Begin with the lowest practical value, then increase it when a faster shutter is necessary. A slightly noisier sharp image is often more usable than a clean but blurred file.
Select enough speed for wind, aircraft vibration, focal length, and subject motion. Telephoto views and moving vehicles usually reveal movement more readily than wide stationary landscapes.
Many compact drones have a fixed aperture. On adjustable-aperture models, balance light, depth of field, shutter requirements, and possible diffraction rather than assuming one value is always sharpest.
Fixed white balance can keep a series consistent. Automatic white balance can be useful when the lighting changes rapidly. RAW files allow more flexible correction afterward.
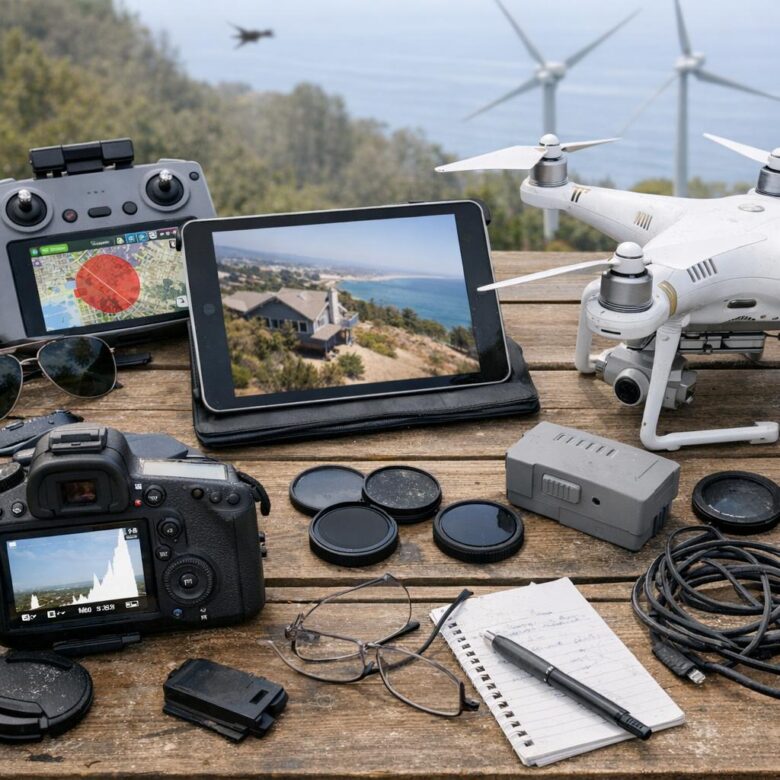
Use the histogram and clipping warnings
Information pressed strongly against the left edge may indicate areas recorded without useful shadow detail.
Information pressed against the right edge may indicate important bright areas recorded without recoverable texture.
A histogram does not need to form a centered mountain. Snow, beaches, night scenes, dark forests, and silhouettes naturally produce different tonal distributions. Use it to identify clipping and understand the scene rather than trying to create a predetermined shape.
Spot metering is not available on every drone and is not always the best choice. Evaluative metering, exposure compensation, manual exposure, or exposure lock may be more appropriate depending on the camera and subject.
Assuming autofocus or infinity focus is always correct
Aerial scenes often contain distant subjects, but that does not make every infinity position automatically sharp. Some drones use autofocus, some use fixed-focus cameras, and others provide several cameras with different minimum focus distances.
Autofocus may struggle with blank sky, haze, reflective water, fog, low-contrast surfaces, darkness, or a subject that occupies only a small part of the frame.
A more reliable focus routine
- Select a detailed area at approximately the same distance as the main subject.
- Tap to focus when the camera supports it.
- Confirm the focus indication or absence of a warning.
- Capture a test photograph.
- Magnify the file and inspect edges, texture, and fine detail.
- Recheck after changing cameras, focal lengths, subject distance, or focus mode.
Clean the lens before takeoff. Fingerprints, condensation, mist, dust, or a forgotten transport cover can create a soft image that resembles a focus problem.
Do not spend a complete flight photographing an important scene before checking one full-resolution file. The live controller preview may be compressed, reduced in resolution, or affected by screen glare.
Believing RAW is mandatory or capable of restoring everything
RAW or DNG files preserve more original image information and provide greater editing flexibility for white balance, highlights, shadows, color, sharpening, and noise reduction. They are useful for important travel images, difficult lighting, printing, client delivery, and deliberate post-production.
JPEG remains practical for fast sharing, simple documentation, limited storage, and images that already look correct in camera. RAW is not mandatory for every casual photograph.
Neither format can guarantee recovery of completely clipped highlights, severely underexposed shadows, missed focus, motion blur, or atmospheric detail that was never recorded.
| Capture option | Useful when | Common mistake |
|---|---|---|
| JPEG | Fast delivery, casual sharing, small files, and minimal editing | Assuming the processed file can tolerate the same major exposure and white-balance changes as RAW |
| RAW or DNG | Editing flexibility, difficult contrast, printing, color correction, and important work | Assuming every clipped highlight or dark shadow can be restored |
| RAW + JPEG | An immediate processed file and an editable original are both useful | Ignoring additional storage use or slower capture behavior in certain modes |
| AEB | Static high-contrast scenes such as bright skies above shaded land | Combining frames with moving people, vehicles, branches, waves, or significant aircraft movement |
Automatic Exposure Bracketing records multiple frames at different exposures on compatible cameras. It may increase the chance of preserving both bright and dark areas, but movement can create alignment problems or ghosting during blending.
When using AEB, also consider recording a strong single frame. The bracketed sequence may become difficult to combine when the aircraft, foliage, water, traffic, or people move.
Using composition rules without deciding what the subject is
The rule of thirds can help create visual balance, but centered composition can be stronger for symmetry, roads, bridges, pools, courtyards, isolated subjects, and top-down patterns.
The real problem occurs when the photographer has not decided where the viewer should look. A small subject surrounded by unrelated space may appear accidental even when it sits precisely on a grid intersection.
Identify the building, person, vehicle, landscape feature, pattern, or relationship that gives the photograph a purpose.
Roads, shorelines, rivers, shadows, fences, and rows of trees can guide attention instead of merely filling space.
A nearby ridge, tree line, roof, shoreline, or terrain feature can create depth in an oblique aerial photograph.
Centered framing can work when the geometry, architecture, road, bridge, or repeated pattern supports it.
Empty water, sky, sand, snow, or land can communicate isolation or scale when it supports a clearly positioned subject.
Check for cut-off buildings, partial vehicles, propeller shadows, unwanted roads, bright distractions, and objects touching the frame.
Plan for the final crop
A photograph intended for a vertical social post, horizontal website header, property listing, square thumbnail, or print may require different space around the subject.
When the same image must serve several formats, capture additional room around the subject. Avoid placing important features so close to the edge that a vertical or square crop removes them.
Using the same camera angle throughout the session
A top-down view is not a cliché when it reveals a pattern, arrangement, contrast, or shape that cannot be understood from the ground. It becomes repetitive when every subject is flattened into the same overhead perspective.
Likewise, an oblique angle is not automatically more professional. Some subjects are clearer directly overhead, while others need visible sides and background context.
A useful short sequence can include:
- Establishing view: shows the broader location.
- Subject-focused oblique view: makes the primary feature large enough to understand.
- Top-down view: reveals shape, layout, or pattern.
- Detail view: isolates one useful feature or texture.
- Alternative orientation: provides a vertical, horizontal, or square-friendly composition.
Variety should not require risky low passes, operation close to structures, or repeated flights over the same uninvolved people. Every new angle needs its own safe route and legal assessment.
Blaming the camera for haze, glare, or unsuitable weather
Moisture, smoke, dust, pollution, heat shimmer, sea spray, and distance can reduce contrast and make distant subjects appear blue or gray. Flying higher or applying stronger editing does not recreate detail that the atmosphere prevented the camera from recording.
Check visibility, humidity, smoke, air quality, cloud cover, wind, recent rain, and sun direction before deciding that a camera is performing poorly.
Polarizing filters have specific limits
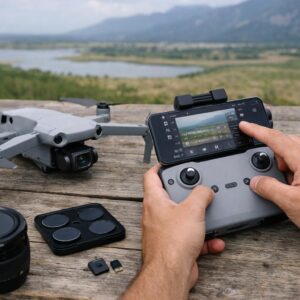
A polarizing filter can reduce certain reflections from water, foliage, glass, or glossy surfaces and may increase sky contrast. Its effect depends on the angle between the sun, camera, and subject.
As the drone rotates, the effect can change. On a wide frame, the sky may become uneven. A polarizer cannot remove all atmospheric haze, smoke, humidity, or distant pollution.
Use a filter designed for the exact camera, install it correctly, and confirm that the gimbal initializes normally. Reduced light transmission may require a slower shutter or higher ISO.
Dehaze is a correction, not a substitute for visibility
Editing tools can restore some contrast, but strong global dehaze may create halos, excessive color, harsh edges, dark skies, and unnatural transitions around mountains or buildings.
There is no universal value such as 10% to 30% that suits every image. Adjust while viewing important edges and use local masking when only one part of the photograph needs correction.
Ignoring vibration and aircraft condition
A soft or uneven photograph may come from aircraft vibration rather than exposure or focus. Damaged propellers, debris in a motor, strong turbulence, gimbal problems, loose filters, impact damage, and abnormal motor behavior can reduce image sharpness.
Before changing camera settings, inspect:
- Propellers for chips, cracks, bending, looseness, or incorrect installation
- Motors for debris, abnormal resistance, grinding, or unusual heat
- The gimbal for obstruction, shaking, overload warnings, or displaced parts
- Lens filters for correct fit and secure installation
- The airframe for impact damage or a loose arm
- Wind and turbulence around buildings, cliffs, trees, and ridges
Do not rely on editing stabilization or sharpening to hide a possible propulsion or gimbal problem. Land and investigate persistent vibration before another flight.
Replace a chipped, cracked, bent, loose, or misshapen propeller using the exact model-specific part and installation procedure.
Overediting the file instead of improving the capture
Drone files can tempt editors to add strong saturation, clarity, texture, sharpening, HDR tone mapping, and dehaze because aerial scenes often contain large areas of land, sky, or water.
Excessive global adjustments can produce bright halos around roofs and mountains, unnatural vegetation, neon water, noisy shadows, oversharpened trees, dark bands in the sky, and inconsistent color between photographs from the same session.
Moderate exposure, white-balance, horizon, crop, local contrast, noise, and color adjustments when the original file contains enough information.
Heavy haze, small framing errors, modest motion softness, uneven polarizer effects, and strong contrast that exceeded one exposure.
Missed focus, severe motion blur, clipped important highlights, major underexposure, corrupted files, or detail hidden completely by weather.
Use presets as starting points
A preset can provide consistency, but it should not be applied blindly to every drone, camera, weather condition, altitude, and time of day.
Review exposure, white balance, highlight clipping, shadow noise, sharpening, lens correction, and color for each image. A preset created for a bright coastal scene may produce severe color or contrast problems in a forest, city, sunset, or overcast property photograph.
Rushing the photograph because the battery is running
Reaching the general camera position is not the same as being ready to photograph. A rushed operator may capture before confirming focus, exposure, horizon, subject placement, or whether a person, vehicle, bird, or obstacle has entered the route.
The solution is not to hover indefinitely. It is to plan a shorter list and use a consistent capture routine.
Write what the photograph should communicate and identify the intended orientation and final use.
Maintain visual line of sight, inspect the route, and confirm that people, aircraft, wildlife, and obstacles remain clear.
Adjust altitude, distance, yaw, camera angle, and subject placement before changing several camera settings.
Use a detailed focus target, histogram, highlight warnings, and the appropriate exposure mode.
Magnify important detail, check the edges, and confirm that the file—not only the live preview—is usable.
Change one useful variable at a time, such as altitude, exposure, orientation, focal length, or camera angle.
Preserve enough battery for wind, return distance, an alternative landing area, and an unexpected delay.
There is no universal keeper rate that proves improvement. A technical documentation session may require many nearly identical frames, while a planned landscape session may produce only a few final images. Judge the workflow by whether the required photographs are safely and consistently delivered.
Allowing the photograph to override safe flight decisions
A rare sunset, approaching storm, ideal reflection, client deadline, or moving subject can pressure a pilot to continue after the original plan is no longer suitable.
Photography does not remove requirements involving visual line of sight, right of way, airspace authorization, altitude, people, moving vehicles, property access, wildlife, weather, and battery reserve.
Land or abandon the image when:
- The aircraft can no longer be observed as required
- A crewed aircraft approaches the area
- People or moving vehicles enter the planned route
- Wildlife reacts to the drone
- Wind or weather prevents predictable control
- A battery, propulsion, gimbal, compass, positioning, or transmission warning remains unresolved
- The legal status of the airspace or launch location is unclear
- The landing area becomes unavailable
A camera setting, route, weather window, or subject can often be revisited. A collision, injury, wildlife disturbance, airspace conflict, or lost aircraft cannot be justified by the quality of the image.
Quick correction guide
| Problem | Do not assume | Check instead |
|---|---|---|
| The subject looks too small | That a longer digital zoom or heavier crop will solve it | Lower altitude, shorter safe distance, different focal length, and stronger subject placement |
| The image is soft | That more sharpening is the answer | Focus, shutter speed, wind, propellers, vibration, lens cleanliness, and full-resolution detail |
| The sky is white | That RAW will automatically restore it | Highlight clipping, exposure compensation, manual exposure, AEB, and the importance of the bright area |
| The shadows are noisy | That the camera always needs a lower ISO | Original exposure, shadow recovery, sensor mode, temperature, and whether the file was severely underexposed |
| The horizon appears tilted | That every ridge or shoreline should be horizontal | Reliable references, perspective, terrain, lens distortion, and gimbal-roll behavior |
| The scene appears hazy | That a polarizer or dehaze slider can restore all detail | Visibility, smoke, humidity, pollution, distance, sun angle, and a more suitable time |
| The frame feels empty | That the subject must always be placed on a rule-of-thirds point | Subject size, negative-space purpose, symmetry, visual balance, layers, and final crop |
| Every image looks similar | That a higher altitude will create variety | Oblique, top-down, detail, context, vertical, horizontal, and different light-direction options |
Before pressing the shutter
- The purpose of the photograph is clear
- The flight remains legal and safe
- Visual line of sight can be maintained
- The route remains clear of people and aircraft
- The selected altitude adds useful information
- The subject is large enough to understand
- The camera angle supports the subject
- The horizon or chosen diagonal is intentional
- The frame edges are free from distractions
- The final crop has been considered
- The lens is clean
- The propellers and gimbal behave normally
- Focus has been confirmed
- Shutter speed suits movement and wind
- ISO is appropriate for the required shutter
- Important highlights are not unintentionally clipped
- The main subject is not severely underexposed
- White balance suits the series
- RAW, JPEG, or both match the workflow
- AEB is used only when the scene benefits
- A test image has been reviewed
- Enough battery remains for a safe return
- Original files will be backed up before formatting
Frequently asked questions
What altitude is best for drone photography?
There is no universal best altitude. Use the lowest safe and legal position that communicates the subject, then climb only when additional context strengthens the photograph.
Is golden hour always better than midday?
No. Golden hour can provide warm directional light and texture, while midday can work well for top-down patterns, bright water, pools, and scenes where long shadows would hide useful detail.
Should every aerial photograph be shot at ISO 100?
Begin with the lowest practical ISO, but raise it when necessary to maintain a shutter speed suitable for wind, focal length, aircraft vibration, or subject movement.
Is 1/500 second required for sharp drone photographs?
No. It can be a useful daylight starting point, but calm wide-angle scenes may allow slower shutter speeds, while telephoto views, wind, or moving subjects may require faster ones.
Is RAW necessary for professional-looking images?
RAW provides greater editing flexibility, but a correctly exposed JPEG can still look excellent. RAW is especially useful for difficult lighting, deliberate color work, printing, and important client images.
Can a polarizing filter remove aerial haze?
It can reduce certain reflections and increase contrast in suitable directions, but it cannot remove all moisture, smoke, pollution, dust, or distant atmospheric haze. Its effect also changes as the drone rotates.
Should the horizon always be perfectly level?
Water horizons and city skylines often reveal unintended tilt clearly. Mountains, roads, rivers, and curved coastlines may not provide a naturally level reference. The composition should look intentional rather than mechanically corrected.
How many photographs should be taken during one flight?
There is no ideal number. Capture enough technically sound variations to complete the planned shot list without wasting battery on repeated images that do not serve a clear purpose.
Improving drone photography does not require memorizing permanent numbers. It requires identifying what weakened the image and correcting the right part of the process—altitude, light, focus, exposure, composition, aircraft condition, editing, or flight planning.
When each photograph begins with a clear purpose and a safe route, the operator spends less battery collecting random frames and more time creating images that are intentional, technically usable, and honest about the scene.
Official references
- FAA — Recreational flying, visual line of sight, and safe operation
- FAA — Small Unmanned Aircraft Systems Regulations, Part 107
- DJI Developer — Camera exposure, AE lock, AEB, and white-balance controls
- DJI Developer — Camera modes, RAW photography, and exposure concepts
- Adobe — Histogram, tonal controls, and clipping previews
- Adobe — Local masking and selective image adjustments
- Canon — Polarizing filters, reflections, and landscape contrast

Dflyco Editorial Team creates practical, well-researched content about drones, aerial photography, flight safety, and responsible drone use. Our articles are reviewed using official documentation, manufacturer specifications, and trusted aviation sources to help readers make informed decisions.