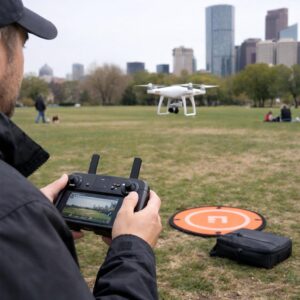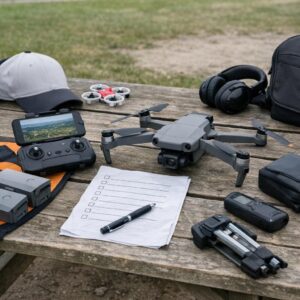
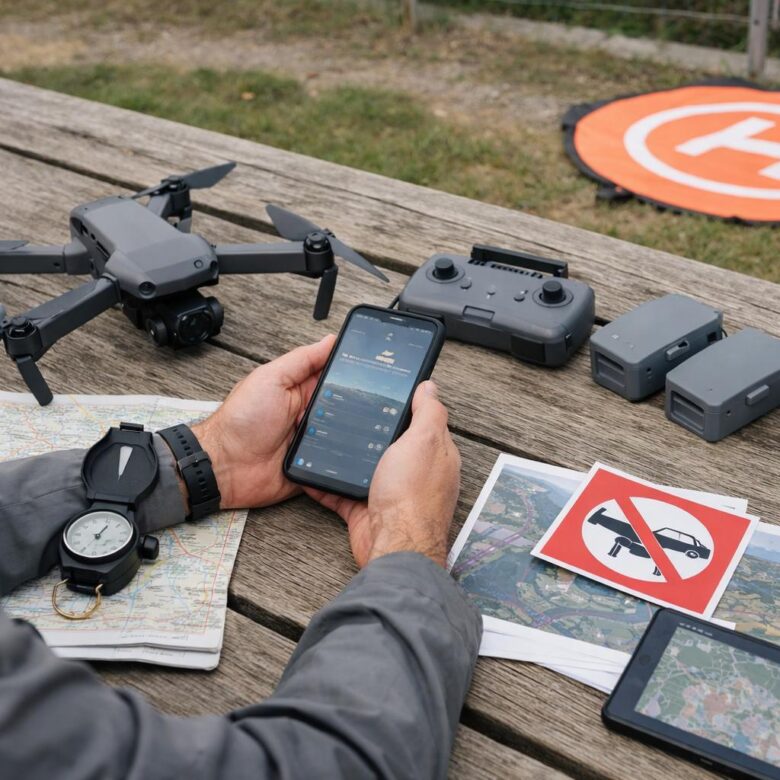
A safe drone flight begins before the motors start. A few deliberate checks can reveal damaged equipment, unsuitable weather, airspace restrictions, weak positioning, or a return route that is more difficult than it first appears.
The exact rules depend on where you fly and why you are flying. This guide provides a practical preparation process and uses United States requirements as an example where legal details are needed. Pilots in other countries should check the aviation authority and local rules that apply to their location.
The 60-second go-or-no-go review
1. Confirm which rules apply to the flight
Do not assume that a small drone or a short flight is automatically exempt from aviation rules. The applicable requirements can depend on the purpose of the flight, aircraft weight, airspace, location, registration status, time of day, and whether people or moving vehicles will be below the aircraft.
In the United States, the FAA distinguishes flights conducted strictly for recreation from operations conducted under Part 107. Part 107 is not limited to work that earns money. A flight performed for a business, organization, property listing, inspection, promotional project, or another non-recreational purpose may fall under Part 107 even when no payment is received.
A Part 107 Remote Pilot Certificate does not expire unless it is surrendered, suspended, or revoked. However, certificate holders must complete the appropriate recurrent training every 24 calendar months to maintain aeronautical knowledge currency.
Before leaving for the site, confirm any requirements involving:
- Pilot certification or recreational safety testing
- Aircraft registration and Remote ID
- Controlled-airspace authorization
- Maximum altitude
- Visual line of sight
- Night operations and lighting
- Operations over people or moving vehicles
- Temporary flight restrictions and security-sensitive locations
- Local permission to enter, launch, or land on the property
United States recreational flights
Recreational pilots must follow the FAA recreational-flyer requirements, complete the free TRUST safety test, follow the safety guidelines of an FAA-recognized community-based organization, keep the drone within visual line of sight, yield to other aircraft, and obtain authorization before entering controlled airspace.
In uncontrolled Class G airspace, recreational operations are generally limited to no more than 400 feet above ground level. This does not mean that every location below 400 feet is open for flight. Temporary restrictions, prohibited areas, emergency activity, land-management rules, wildlife protections, local restrictions, and other requirements may still apply.
Controlled airspace and LAANC
In the United States, drone pilots planning to operate in controlled airspace around airports must receive FAA authorization before flying. LAANC can provide near-real-time authorization for many operations at or below the altitude shown for an eligible location.
Use an FAA-approved LAANC service supplier for authorization. For recreational situational awareness, use one of the current FAA-approved B4UFLY service providers rather than relying on an old application name mentioned in an outdated article.
Check airspace while planning the flight and check it again shortly before takeoff. Temporary flight restrictions and emergency activity can appear after the original plan was made.
Parks and managed land
Airspace rules and permission to use the ground are related but separate issues. A land manager may restrict where a pilot can stand, launch, land, park, or operate equipment even though aviation authorities regulate the airspace.
In most areas administered by the U.S. National Park Service, launching, landing, or operating a drone from NPS lands and waters is prohibited unless the superintendent provides written approval. This is more precise than saying that every flight anywhere above every national park is automatically prohibited.
Before flying near a park, beach, forest, historic site, state property, municipal property, or protected habitat, check the rules for that specific location. Do not rely only on a general map label.
2. Inspect the drone instead of relying on the app
Software warnings are useful, but they do not replace a physical inspection. Examine the aircraft in good light before installing the battery.
Airframe and landing structure
Look for cracks, separation around joints, bent arms, impact marks, loose screws, damaged antennas, blocked vents, and parts that no longer sit evenly. Pay extra attention after a hard landing, transport incident, or propeller strike.
Propellers and motors
Check each blade for chips, splits, bent tips, stress marks, looseness, or incorrect installation. Turn the motors gently by hand while the aircraft is powered off. Unexpected resistance, scraping, or uneven movement deserves investigation before flight.
Battery and contacts
Do not use a battery that is swollen, leaking, punctured, unusually hot, physically damaged, or displaying persistent cell or communication errors. Remove it from service and follow the manufacturer’s storage and disposal instructions. Do not puncture, crush, or place a lithium battery in ordinary household trash.
Camera and sensors
Remove the gimbal protector, clean the lens, and inspect obstacle-sensing and positioning cameras. Dirt, fingerprints, protective film, water droplets, and strong scratches can affect image quality or sensor performance.
Stop when the aircraft has unexplained structural damage, a swollen battery, an incorrectly installed propeller, recurring motor errors, a damaged power connector, or warnings that you do not understand. A delayed flight is less costly than testing a suspected fault in the air.
3. Prepare software and positioning before arriving
Firmware, application, controller, map, and database updates should normally be completed before the flight day when possible. Updating at the launch site can introduce compatibility problems, consume batteries, require a new login, or leave too little time for a controlled test.
After powering on the equipment:
- Confirm that the controller and aircraft connect normally.
- Review every warning instead of immediately dismissing it.
- Check that the map position matches the real location.
- Wait for a stable positioning status and a confirmed home point when the flight depends on GNSS.
- Confirm that the aircraft orientation shown in the app matches its real orientation.
- Verify the controller, mobile device, and aircraft battery levels.
- Check available storage on the aircraft or memory card.
There is no universal satellite-count rule such as “eight in the countryside” or “ten in a city.” Satellite geometry, interference, the aircraft’s navigation system, and the manufacturer’s software all matter. Use the aircraft’s documented readiness indication, confirm the home point, and avoid launching when positioning remains unstable.
Compass calibration should not be treated as a ritual required before every flight. Follow the aircraft manual and calibrate when the manufacturer instructs you to do so. Avoid calibrating beside vehicles, reinforced concrete, metal structures, power equipment, or other sources of magnetic interference.
4. Check more than the temperature icon
A general forecast can be a useful starting point, but drone preparation should also consider local wind, gusts, visibility, precipitation, temperature, cloud conditions, and how quickly conditions may change during the planned flight.
| Condition | Why it matters | What to review |
|---|---|---|
| Wind and gusts | A headwind on the return leg can increase energy use and reduce the distance available for a safe return. | Surface wind, gusts, direction, terrain effects, and conditions above nearby trees or buildings. |
| Temperature | Cold can reduce battery performance, while excessive heat can affect batteries, electronics, and mobile devices. | The operating-temperature range in the aircraft and battery manuals. |
| Rain or moisture | Many consumer drones are not waterproof and can be damaged by rain, mist, spray, or wet surfaces. | Precipitation forecast, visible rain shafts, fog, dew, and the aircraft’s water-resistance rating. |
| Visibility | Haze, fog, smoke, darkness, or glare can prevent the pilot from maintaining visual line of sight. | Whether the aircraft can remain clearly visible throughout the entire route. |
| Sun and lighting | Low sun can impair the pilot’s view and reduce the usefulness of obstacle-sensing cameras. | Sun direction, shadows, glare, and the intended flight path. |
| Storm activity | Thunderstorms can bring rapidly changing winds, precipitation, lightning, and poor visibility. | Radar, weather alerts, nearby storm development, and an escape plan. |
Do not treat wind resistance as a target
DJI lists a maximum wind-speed resistance of 10.7 m/s, approximately 24 mph, for the Mini 4 Pro. That specification is not a recommendation to routinely fly at that wind speed, and it does not account for every gust, altitude, payload, battery condition, route, or return direction.
Use a conservative margin below the manufacturer’s stated limit. Consider the strongest expected gust rather than only the average wind. If the outbound flight is downwind, remember that the aircraft may have to fight a headwind to return.
The Mini 4 Pro’s official operating-temperature range is -10°C to 40°C, or 14°F to 104°F. Other drones and batteries may have different limits. Follow the specifications for the exact aircraft rather than using a universal temperature threshold.
DJI also states that the Mini 4 Pro is not waterproof. If rain begins, the manufacturer advises returning and landing as soon as possible and allowing the aircraft to dry fully before it is used again.
5. Walk the site before launching
Maps and satellite images can miss recent construction, temporary cables, cranes, tree branches, fences, crowds, emergency activity, or a takeoff surface that interferes with the compass.
Walk the immediate area and identify:
- Power lines, thin wires, antennas, cranes, poles, and branches
- People, animals, roads, vehicles, and entrances
- Nearby airports, heliports, hospitals, and emergency routes
- Potential magnetic or radio interference
- A clear primary landing area
- At least one alternative landing area
- Terrain that could block the controller signal
- Reflective water, glass, repetitive surfaces, or low-light areas that may limit positioning sensors
Obtain permission to access and use private property. Consider the privacy and comfort of nearby people, even when a flight appears technically legal. Avoid placing bystanders in a situation where they unexpectedly become part of the operation.
6. Set the home point and return-to-home behavior
Return to Home is a backup feature, not a substitute for active piloting. Its behavior varies by aircraft, mode, signal condition, obstacle sensing, battery level, and software settings.
Before takeoff, confirm:
- The home point appears in the correct place.
- The selected return-to-home altitude accounts for relevant obstacles.
- The chosen altitude remains compatible with applicable legal limits.
- The route back does not pass through trees, cables, structures, or restricted areas.
- You understand what the aircraft will do after signal loss.
- The controller’s RTH button and cancel procedure are familiar.
Flights launched from a boat, moving location, or long walking route require extra planning. A home point recorded at takeoff may no longer be a suitable landing location later.
7. Plan the route around battery reserve
There is no single battery percentage that is safe for every takeoff or landing. The correct reserve depends on wind, distance, temperature, aircraft condition, altitude, route, available landing areas, and battery health.
Start with enough energy to complete the planned route while preserving a meaningful reserve. Do not use the manufacturer’s maximum advertised flight time as the duration available for ordinary flying. Published endurance figures are commonly measured under controlled conditions and may differ substantially from a real flight.
Plan the most demanding part of the return before launching. A long flight that finishes against the wind or above difficult terrain requires more reserve than a short flight close to a clear landing area.
8. Decide in advance when the flight will end
Pilots often make worse decisions after spending time traveling to a location or waiting for a particular shot. Clear abort conditions make it easier to stop before a manageable problem becomes an emergency.
Land or cancel the flight when:
- Wind or gusts exceed the conservative limit chosen for the aircraft and route.
- Rain, fog, smoke, or rapidly worsening visibility appears.
- A crewed aircraft approaches the area.
- People or vehicles enter a part of the operation that was intended to remain clear.
- The aircraft reports a motor, battery, positioning, compass, or control-link warning.
- The video feed or control connection becomes unreliable.
- The return route requires more energy than originally planned.
- The pilot can no longer maintain visual line of sight.
- Emergency personnel begin operating nearby.
- The pilot feels rushed, distracted, unwell, or uncertain about the rules.
9. Configure the camera before takeoff
Camera settings are easier to review on the ground. Choose the resolution, frame rate, exposure mode, white balance, image format, and storage location before launching.
There is no universal setting such as 4K at 60 frames per second for every social-media project or 4K at 24 frames per second for every property video. The right choice depends on the intended platform, available light, movement, storage, editing workflow, and final delivery.
A short shot list can reduce unnecessary hovering and repeated passes. It can also help the pilot spend more attention on the aircraft and surrounding airspace instead of improvising every camera movement.
10. Use a deliberate launch sequence
- Place the aircraft on a stable, clear surface away from loose debris.
- Confirm that the propellers and battery are securely installed.
- Verify the correct flight mode and control settings.
- Check the home point and positioning status.
- Look and listen for crewed aircraft.
- Confirm that people and animals are clear of the propellers.
- Start the motors and listen for unusual sound or vibration.
- Rise to a low, safe hover when conditions permit.
- Check stability, controls, battery information, and camera feed.
- Continue only when the aircraft behaves normally.
Complete pre-flight checklist
- Flight purpose and applicable rule set confirmed
- Pilot requirements and documents checked
- Registration and Remote ID checked when applicable
- Airspace reviewed
- Required authorization received
- Temporary restrictions checked
- Landowner or site permission confirmed
- Airframe inspected
- Propellers inspected and secured
- Motors move normally
- Battery undamaged and adequately charged
- Controller and mobile device charged
- Lens and sensors clean
- Storage space available
- Software warnings reviewed
- Stable positioning confirmed
- Home point verified
- Return altitude and route reviewed
- Wind and gusts acceptable
- Temperature within equipment limits
- No precipitation or unsafe visibility
- Primary and alternate landing areas identified
- Obstacles and people assessed
- Battery reserve planned
- Abort conditions defined
- Low hover check completed
Common pre-flight mistakes
- Using an old screenshot of an airspace map: restrictions and conditions may have changed.
- Waiting until the launch site to update everything: a new login, download, restart, or compatibility problem can stop the flight.
- Launching immediately after the home-point message: first confirm that the point is actually in the correct location.
- Flying to the advertised endurance limit: laboratory endurance is not a practical battery plan.
- Calibrating the compass beside a vehicle: nearby metal can contribute to an inaccurate calibration.
- Looking only at ground-level average wind: gusts and stronger wind above obstacles may be more important.
- Assuming obstacle sensing sees everything: thin wires, branches, low light, reflective surfaces, and some flight modes can reduce protection.
- Continuing because the trip took a long time: travel time does not make unsafe conditions acceptable.
Frequently asked questions
How many satellites are needed before takeoff?
There is no universal minimum that applies to every drone and environment. Wait for the aircraft to report stable positioning, verify that the mapped position is correct, and confirm the home point. Follow the manual for the exact aircraft.
Should the compass be calibrated before every flight?
Usually not. Follow the manufacturer’s instructions and calibrate when the aircraft or manual calls for it. Avoid performing calibration near metal, vehicles, reinforced concrete, electrical equipment, or magnetic interference.
Can a drone fly when the wind matches its rated resistance?
A maximum wind-resistance specification is not a recommended everyday operating target. Gusts, altitude, battery health, route, payload, and the wind direction during the return can make the real flight more demanding. Use a conservative margin.
Is Part 107 required only when the pilot is paid?
No. In the United States, the purpose of the flight matters. Operations that are not conducted strictly for recreation may fall under Part 107 even when the pilot receives no payment.
Preparation does not eliminate every risk, but it gives the pilot more time to identify problems while the aircraft is still safely on the ground. When a legal requirement, warning, weather condition, or equipment issue remains unclear, postponing the flight is the responsible decision.
Official references
- FAA — Recreational Flyers and Community-Based Organizations
- FAA — B4UFLY services
- FAA — Low Altitude Authorization and Notification Capability
- FAA — Becoming a certificated remote pilot
- FAA — Part 107 operating rules
- National Park Service — Uncrewed aircraft in national parks
- DJI — Mini 4 Pro specifications
- DJI — Mini 4 Pro product FAQ and water warning
Dflyco Editorial Team creates practical, well-researched content about drones, aerial photography, flight safety, and responsible drone use. Our articles are reviewed using official documentation, manufacturer specifications, and trusted aviation sources to help readers make informed decisions.